Construction Delivery Methods Training
Properly using Scotch packing tape (or any high-quality brand) ensures your boxes remain securely sealed during moving, shipping, or storage. While it may seem simple, mastering the right technique effectively prevents boxes from accidentally bursting open or the tape from peeling off.
Here is a step-by-step guide to achieving an easy, professional, and highly secure seal.
Step 1: Prepare the Box and Surfaces
A secure seal begins before the tape even touches the box.
1. Fold the flaps correctly: Always fold the two shorter flaps inward first, then fold the two longer flaps over them. This creates a tighter, more stable center seam.
2. Ensure surfaces are clean and dry: Dust, dirt, and moisture are the enemies of adhesives. Wipe away any debris from the top of the box.
3. Check the temperature: Adhesive performance drops in extreme cold. If you are packing in a cold garage, keep the tape roll indoors for 30 minutes before use to maintain the adhesive's flexibility and tackiness.
Step 2: Use the Right Tools (Highly Recommended)
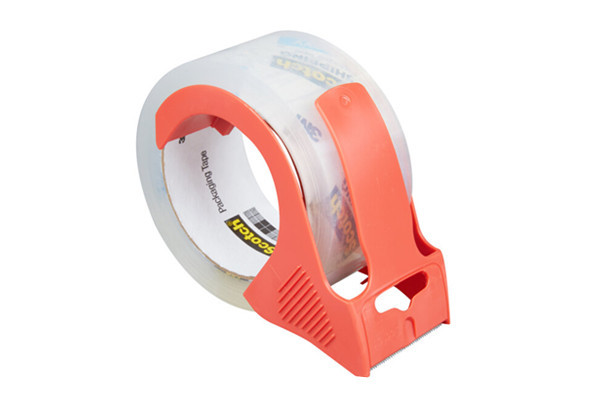
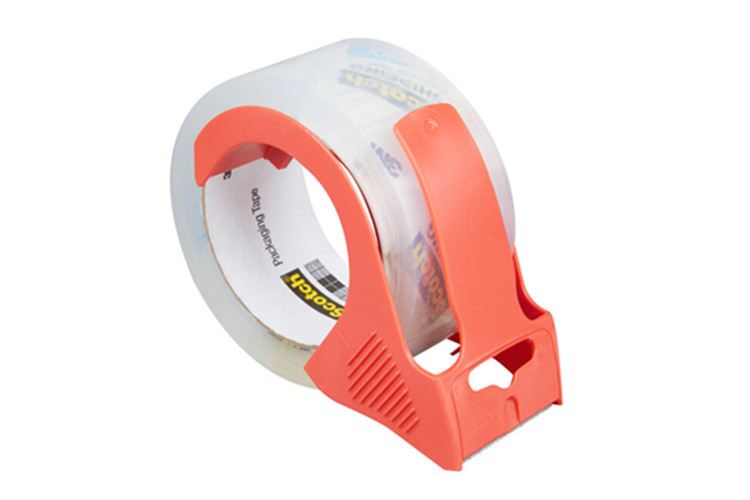
While you can tear tape by hand or with scissors, using a handheld tape dispenser (tape gun) is the best way to achieve a secure seal.
1. Why? A tape gun applies even tension, prevents the tape from sticking to itself, and allows you to smooth the tape down with the built-in roller as you apply it.
2. The Scotch Heavy Duty Shipping Packaging Tape Dispenser features an ergonomic design that reduces hand fatigue and ensures smooth, quiet dispensing.
Step 3: The "H-Tape Method" (Industry Gold Standard)
For maximum security—especially for boxes weighing over 15 lbs (approx. 6.8 kg) or those being shipped—use the "H-tape method." It gets its name from the pattern the tape forms on the top and bottom of the box, which resembles the letter "H."
Instructions:
1. Seal the center seam: Pull out a length of tape long enough to cover the entire center seam plus an extra 2 to 3 inches of overhang at each end. Press the tape firmly along the center line.
2. Seal the first edge: Apply a second strip of tape perpendicular to the first, covering the junction where the box flaps meet the side walls. The tape should extend about 2 to 3 inches down onto the side walls.
3. Seal the second edge: Repeat the process on the other side of the center seam.
4. Repeat on the bottom: Flip the box over and apply an "H-shaped" seal to the bottom in exactly the same way.
* Note: For lightweight boxes (under 10 lbs) intended only for closet storage, a single strip of tape along the center seam is usually sufficient.
Step 4: Pro Tips for a Perfect Seal
1. Apply even pressure: Don't just lightly place the tape on the box. Use your thumb or the roller on the tape gun to press the tape firmly into the cardboard, especially along the center seam and edges. This activates the pressure-sensitive adhesive.
2. Do not stretch the tape: Pulling the tape too tightly during application creates tension. Once cut, the tape will try to retract to its original length, causing the edges to lift or the tape to snap. Allow the tape to lay flat naturally. 3. Select tape based on carton weight:
* Thickness 1.6 to 2.0 mil: Suitable for lightweight cartons, documents, and general item storage.
* Thickness 2.5 to 3.0+ mil (Heavy-duty): Suitable for cartons weighing over 30 lbs, long cartons, or cartons containing shifting contents.
4. Avoid the "tenting effect" (tape bridging): Ensure carton flaps lie completely flat before taping. If there is a gap or ridge in the center, the tape will bridge over it like a "tent," creating a weak point prone to breaking under pressure.
Step 5: Proper storage to extend lifespan
If you do not use the entire roll at once, store it properly to maintain its adhesiveness:
1. Store the tape in a cool, dry place away from direct sunlight (UV rays can degrade adhesive performance over time).
2. Store on its side or hang it on a dispenser hook to prevent deformation from pressure, which can cause the layers to stick together (blocking).
Troubleshooting Common Issues
1. Tape makes a harsh squeaking sound: This is normal for standard acrylic BOPP tape; if the noise is bothersome in an office environment, consider purchasing "low-noise" or "quiet" Scotch tape.
2. Tape won't stick securely to the carton: This may be due to dust or wax coating on the carton surface, or low temperatures. Clean the surface, warm the tape, or switch to hot-melt tape (which offers higher initial tack and is suitable for hard-to-bond surfaces).
3. Tape breaks frequently: This may be caused by pulling too fast, over-stretching, or using tape that is too thin (low mil count). Consider switching to heavy-duty (3.0 mil) tape. By following the "H-seal" method and using a tape dispenser, you can ensure Scotch packaging tape performs at its best, keeping your items safe, secure, and intact during transit.